Sunday, September 23, 2012

Kalmbach Bead Soup!

Hey all! In celebration of the release of Lori Anderson's Bead Soup Book, the Kalmbach facebook page sent out a call to designers who wanted to receive a bead soup and make a necklace to show on their page.

Free beads? Yep, I'm there!

So, last weekend I received my soup. A lovely collection of purple beads and crystals with some silver thrown in! My lovely soup was furnished by Advantage Beads in Wichita, KS. Neighbors!

bead soup

So, I really loved the purples of this soup, but there wasn't a clear focal to work with. So, what to do? Make a focal! I took the coin pearl, used some really, really round peyote to make a bezel for it with black size 11s. From there, I built out and made herringbone flower petals in coordinating purple size 11s. Add a bail to the back(peyote) and it was ready to hang from a double strand of 6mm black glass pearls. To dress up the black pearls, I used one of the large light purple crystals with some silver bead caps and a silver bead. These are set to one side to make an unexpected asymmetrical design. Add some cones to hide the crimps and attach some silver plated chain. I then used the silver toggle that was in the soup as the closure (not pictured).
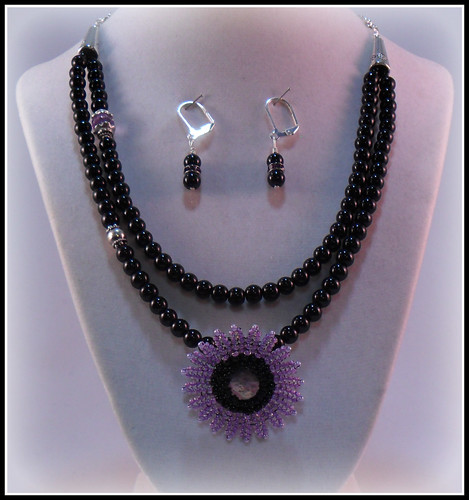
kalmback_beadsoup

Though the letter that came with my soup only asked me to make a necklace, I really wanted to make another piece as well... and to use a little more of the actual soup. So, I found that my soup had two purple crystal rondelles, and the rule is "if you have two make earrings!". So I did.

Pin It!

Monday, September 10, 2012

Monday Monday MONDAY!!!!

Happy Monday.

sunflowers

I have been completely entralled with wild sunflowers lately. They are blooming everywhere here in North East Kansas. I get to admire them on the long drive to and from work.

So, remember when I won the stencils? Here is my first project with them.

frame

Sorry, but I was so excited to get to it, that I did not take any before or in progress pictures. I started with a $0.99 wooden frame I picked up at Walmart. I prepared the frame by sanding the edges (they were kinda rough). Once that was done, I did a base coat with some black craft paint.

My original idea was to stencil in silver on the black, but it was suggested to me that the silver/black combo was really quite played out. So, instead we have old nickel on black. Tones the whole thing down a bit. This was the small scroll all over stencil. I used a spray of stencil adhesive to hold it down to the frame.

The instructions that come with these stencils have you use the brush in a circular motion rather than pouncing. This works nicely if you are trying to shade. However, I did find that it shoved the paint against the edges if you didn't off load the brush enough, and some spots ended up with a slight ridge at the edge. Once I figured out to off load until the brush was nearly dry, this went away.

In all, I am rather happy with how this project turned out. I am planning to add one of my parent's wedding photos. Since this frame doesn't have any glass I am gonna print one on photo paper and then coat it with resin. This should help keep it rigid in the frame and protect it somewhat.

Let me know what you think in the comments!
Pin It!
Related Posts Plugin for WordPress, Blogger...