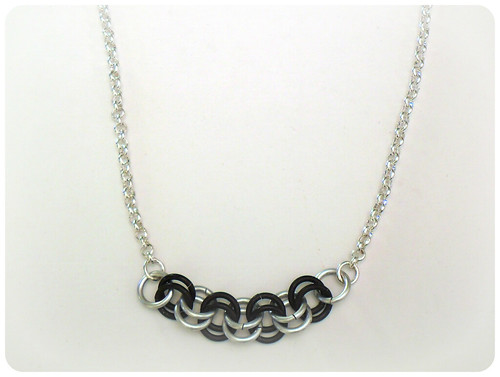
I finished a couple of new necklaces today. The first is a 2 in 2 chainmaille weave for the focal. I added some rollo chain bracelets to either side, and a necklace was born!
I created this while working on some other chainmaille projects that I can't show, as they are prezzies.
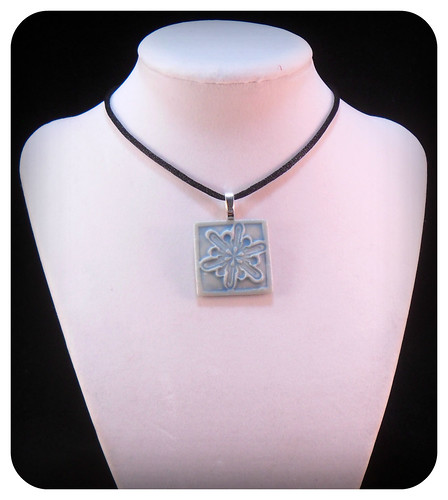
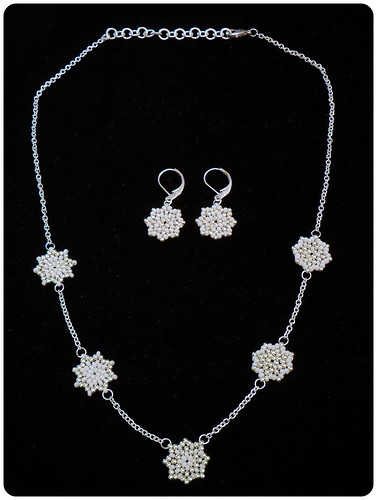
Next we have a beadweaving piece. The small motifs are done in circular peyote stitch and are connected with some fine silver plated chain. I have declared the silver and white ones to be snowflakes - thus each one (earrings not withstanding) is unique.
You most likely won't get any new posts from me this next week, as I will be out of town on a trip for work. If you don't hear from me before then.... MERRY CHRISTMAS TO ALL!!! And I am outta here!
Saturday, December 15, 2012
Thursday, December 13, 2012
New Ring Pattern: Star of David
Thursday, December 6, 2012
From Pendant to Ornament
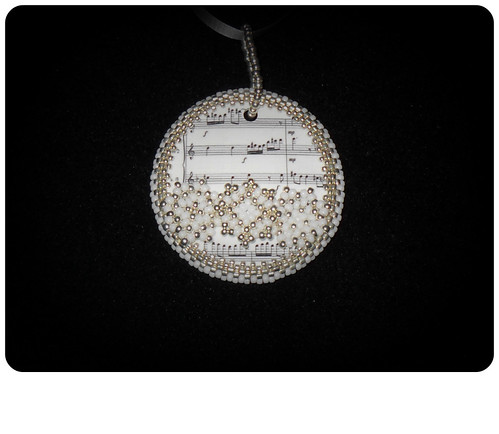
Remember this pendant I posted a few weeks ago?
I decided it was too big to be a pendant, and made it an ornament instead.
I added some snowflakes to fill in the blank spot where there was no music. What do you think? Would you hang it on your tree?
I decided it was too big to be a pendant, and made it an ornament instead.
I added some snowflakes to fill in the blank spot where there was no music. What do you think? Would you hang it on your tree?
Sunday, December 2, 2012
And the winners are...
Ok, I included everyone who liked my Facebook page, followed me on Pinterest, or commented. After a manual drawing the winners are....
Prize #1 - Shaiha W.
Prize #2 - Linda R.
Prize #3 - Michelle W.
Thank you to everyone who entered! I have emailed the winners and will have the prizes mailed out soon.
Prize #1 - Shaiha W.
Prize #2 - Linda R.
Prize #3 - Michelle W.
Thank you to everyone who entered! I have emailed the winners and will have the prizes mailed out soon.
Friday, November 30, 2012
I've said this before...
Sometimes things just do NOT work out as planned. So, my 200th post was supposed to be the announcement of a winner in my give a way. Instead, I am apologizing cause apparently Rafflecopter ended the entries early. So...
I am still giving people through the end of today. You can enter by commenting on the give a way blog post or this post (only one entry no matter which post you comment on), or by following me on Pinterest, or by liking my new Facebook page. If you do any of those things before Midnight tonight (11/30/2012) CT, you will get entered in the give a way.
Again, I am SOOOOO sorry for all of the issues with Rafflecopter.
Monday, November 26, 2012
Thanksgiving Give-a-way!
Ok, it is time for my big Thanksgiving Give-a-way! Yeah, I know it was last week, I am still thankful! So, on to the prizes! Yep, I decided to do more than one.
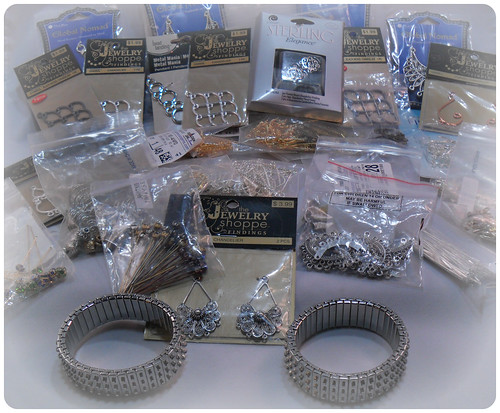
First up is a collection of findings. Featuring a LOT of chandelier components, as well as some earring findings, and some head pins (including some with crystals at the end!) and two cha cha bracelet bases. Metals are plated base metal.
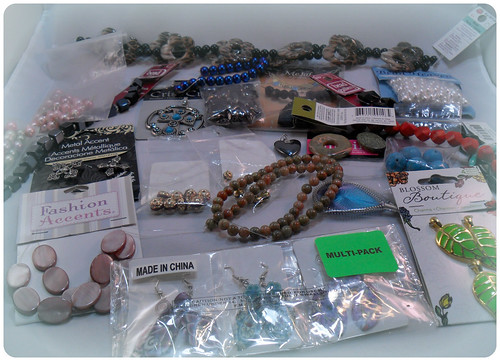
Prize pack number two is a collections of various beads. Some faux pearls, some glass beads, some mother of pearl, some metal leaves, some polymer earrings, and some other random stuff.
Prize pack number three is slightly smaller, but has some awesome funky/vintage pieces, and a couple of pendants I made.
You can enter using the Rafflecopter widget below Ok, Rafflecopter ended early by mistake. I AM still taking entries - Please see this post for details. Please only enter if you are in the US, as I just can't shipped international at this time. Note: I have had some reports of the Rafflecopter widget not working. This seems to be related to using the IE browser. Please try using another browser such as Chrome or Firefox. Thank you.
a Rafflecopter giveaway
First up is a collection of findings. Featuring a LOT of chandelier components, as well as some earring findings, and some head pins (including some with crystals at the end!) and two cha cha bracelet bases. Metals are plated base metal.
Prize pack number two is a collections of various beads. Some faux pearls, some glass beads, some mother of pearl, some metal leaves, some polymer earrings, and some other random stuff.
Prize pack number three is slightly smaller, but has some awesome funky/vintage pieces, and a couple of pendants I made.
Labels:
give-a-way,
huge,
rafflecopter,
stuff,
Thanksgiving
Friday, November 23, 2012
Thanksgiving is over
The meal may be done (except for the leftovers) but the spirit lives on! In the spirit of giving thanks to those who have stuck with me for another year, I will be having a HUGE give-a-way starting Monday. It will be open to US residents only (sorry, but this is gonna be a lot of stuff, and shipping outside the US is out of my budget at the moment!). The prize( or prizes - haven't quite decided yet) will include some wonderful items from the stash I got earlier this fall and will be HUGE!
So, enjoy the rest of your holiday weekend, and come back Monday to check it out and enter!
Saturday, November 17, 2012
Game Review: Just Dance 4 for Wii - Updated!
Thank you to Ubisoft for sponsoring this post. Please click here to learn more about Ubisoft. I was selected for this opportunity as a member of Clever Girls Collective. #UbiChamps
So, my second game review. This time I got a copy of Just Dance 4 for the Wii. Due to problems with my knees caused by the stupid spider bite, the act of actually playing the game fell to my niece and her best friend. Both are 8 and in third grade.Miss M (her parents don't want her actual name or face on the internet) and her friend play Just Dance 4 every morning before school and they LOVE it. The mix of current and classic music was apparently a very big hit - Miss M has been constantly singing Rick Aston, highly amusing! They really liked the chance to move and wake up in the mornings. It is apparenly a wonderful way to start the day!
I managed to get some video of Miss M dancing and asked her some questions about the game.
After I stopped rolling, Miss M told me that one of her favorite songs in the game is Never Gonna Give You Up by Rick Aston. Why? Because the avatar is dressed as a lame super hero and there are dinosuars and giant robots in the background! She is also having fun with more recent hits like Call Me Maybe and Moves Like Jagger. She and her friend are able to compete head to head to see who gets the higher score, or they can work together on a duet! Miss M's mom also had a go at the Just Sweat mode (a workout mode) and said it was a pretty good routine. She was definitely sweating!
So, there you have it, Just Dance 4 is "pretty awesome" and a good work out!If you want to try it for yourself, you can pick up a copy on Amazon. Oh, and the "reading disc" error in the video just means we need to clean the lens on our Wii, it is not the fault of the game!
UPDATE! So Thanksgiving has come and gone and I had to share how much this game added to mine. Like everyone else, I spend Thanksgiving with my family gorging on food and remembering why I only see these people three times a year. At least, that is what I do in the afternoon.
Once evening rolls around, myself and several like minded friends always get together and do something fun to shake off the stress of a day with family. This year, I brought along Just Dance 4. Big Hit. Big. We spent the whole evening dancing, laughing, and having fun! Found out that even with bad knees, so long as I do the arm movements the game still counts it! (Woo! for accessibility!) Also explored the store and found my new favorite thing EVER! You can download.... wait for it.... Gangnam Style! Horsey dance the night away! This group of friends has just found their new go to party game. Woo!
All opinions in this post are mine (or Miss M's). We recieved a review copy of the game, but no other compensation. Thank you.
Labels:
#CleverJD4,
#UbiChamps,
game review,
Just Dance 4,
Miss M
Tuesday, November 13, 2012
Have I mentioned I like shrink plastic?
Cause I really, really do! I won some shrink plastic and a copy of the awesome book Shrink, Shrank, Shrunk!.
So, the shrink plastic I won was made to be printed on in an ink jet printer. So, I printed some sheet music on it, and I liked it, but... there was something about the edges that just wasn't... finished. So, I added some beadwork and I am really happy with the result!
I love being able to combine differing mediums. So, what do we think?
Labels:
beadwork,
bezels,
music,
seed beads,
shrinky dinks
Bedtime woes...
Do you sit on the edge of your bed and lay back, or do you climb into bed on your knees and flip over?
I was always the climb in type. Probably because I am short and have a fairly tall bed, so sitting on the side is awkward at best. And climbing in is just more fun!
I haven't mentioned it, but I was bitten by a spider this summer. A fun result of the spider bite is some really bad arthritis in my knees. My doctor calls it "reactive arthritis" and says it can last about 6 months. I hate it. I hate it hate it hate it hate it HATE IT! Did I mention, I hate it?
I am a heavy girl and I have asthma, so I have never been the most active person in the world, but to have to struggle to stand or just walk across a room is really really frustrating. Part of my job is walking around and helping people, and I can't do that right now. Shopping is a major issue. Waiting in a line is nearly unbearable. I had to fly earlier this week and that was... horrendous is the word that comes to mind. I am on the verge of buying a shower chair... and I'm only 38 (or will be in a month).
But the worst of the restrictions this temporary (oh god let it be temporary!) condition has put on me, is that I can no longer climb into bed. Can't put the pressure on my knees. I forget and try, it gets ugly. So, I am learning to sit sedately on the edge of the bed, and lay back. It's dignified, and mature, and I hate it.
I once heard it said that you know you are old when people stop telling you that you will break your neck and start telling you that you will break a hip... I think I am there.
Tuesday, November 6, 2012
She LIVES!
More than that, she creates!
Earrings made from some silver plated disks and dyed mother of pearl heishi beads.
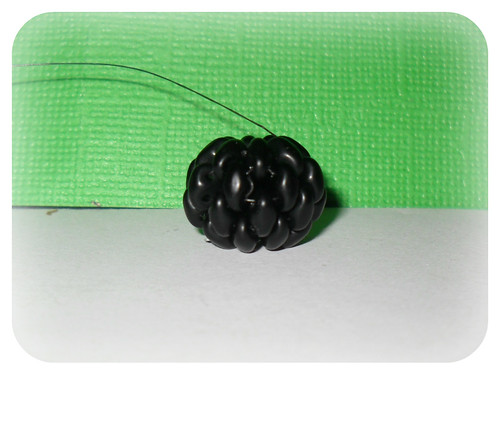
Experimenting with Super Duo beads for the first time... made a beaded bead!
Gotta catch a plane in the morning, so off to bed!
Earrings made from some silver plated disks and dyed mother of pearl heishi beads.
Experimenting with Super Duo beads for the first time... made a beaded bead!
Gotta catch a plane in the morning, so off to bed!
Thursday, November 1, 2012
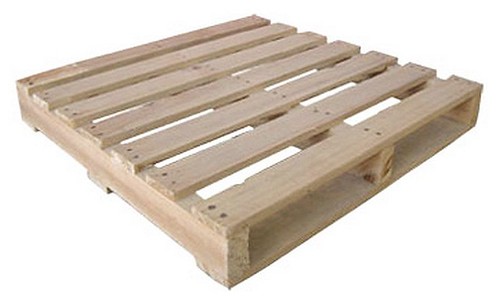
No More Wooden Pallet Projects!
I read a lot of craft blogs (a lot of craft blogs!). I also love the DIY & Crafts section of Pinterest. Both of these love to feature projects "reusing" wooden pallets. Dumbest. Idea. Ever.
Couple of things you should know about wooden pallets (and I used to work in a metal shop where we loaded and unloaded lots of things from pallets, so I speak from experience here):
1) Wooden pallets are made from the cheapest wood possible. The slats are cut with regards to strength, not beauty. They will be bowed, warped, have knots, and have sections missing. All of these things, not pick one.
2) Wooden pallets are one of the best built things in the world! The are fastened together with the intention that they STAY fastened together. You can pick them up, slam them down, run into things, drop them, tip them, bang them together... almost anything, EXCEPT easily take them apart.
3) The reason pallets are so well built, is that they are intended to be used over and over and over and over and over... until they fall apart through sheer wear and tear. There is no need to "recycle" or "reuse" a pallet in your craft project. You are not saving the Earth. You are in fact destroying a pallet that would otherwise keep serving it's pallet-y purpose for years to come. Because of you, another pallet had to be made. You.
So, to all you crafters and would be DIYers out there, I say, "STOP USING PALLETS!!!" If you want to make a wood craft, buy some wood. Or use old barn wood from an architectural salvage company. Or use cardboard (they are doing some amazing things with it!
Tuesday, October 30, 2012
Thursday, October 25, 2012
CSI Miami: Heat Wave Game Review
This is a review of a game on Facebook. I am being paid for this review, but all opinions are my own.
Anyway... I had the chance this past week to play CSI Miami: Heat Wave Game on Facebook. I am actually a relative newcomer to Facebook, but not to gaming. I have played around with computer games, both online and off, for many many years (I still remember games where you had to change out the floppy disk to load a new level!).
As well as being a player of games, I am also completely addicted to police procedurals on television. The original CSI is one of my faves, and while I didn't watch CSI Miami, I am aware of the basics - Cute lead CSI guy named Horatio who wears shades and says the cool lines.
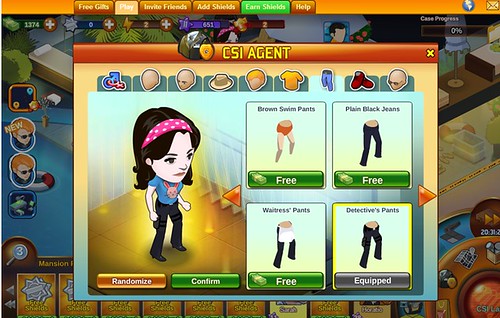
So, with a background in games, and in police procedurals I am not sure what exactly I expected from a police procedural game, but I do know I kinda like what I got. CSI Miami Heatwave has nice graphics (my niece declared all the characters look like bobble heads!), it has the ability to customize your character, and it sets clear goals for what you should be doing... no wandering around wondering what is next!
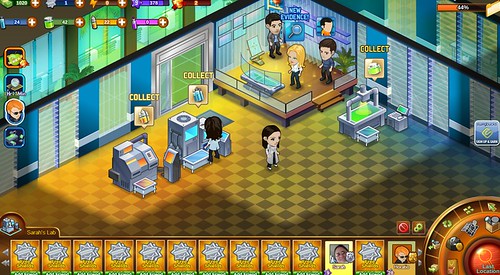
You start each case with Horatio - he will tell you about the case, make a witty comment, and don his shades! Then you start collecting evidence at the crime scene!
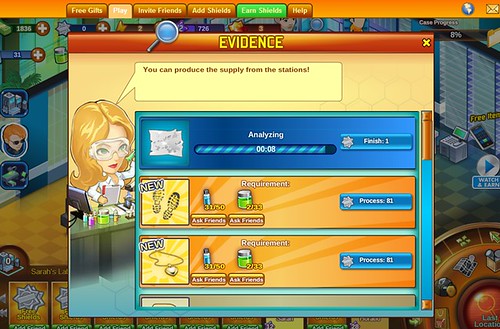
Once you have collected the evidence, it is back to the lab to process it! You gather supplies from the various machines to help with this.
As you process evidence, this leads to suspects. You get to pick the best question to ask them to either reveal new suspects, new places to search for evidence, or to make them confess to the crime!
During each case, there a side goals like finding certain items at a scene, or expanding your lab, or buying new equipment. So, lots to keep you moving and playing!
One thing I struggled with at first was getting to places at the edge of the screen. I eventually found that I could click and hold on the ground and drag things into view, but this wasn't intuitive like most of the controls. Kinda annoying, but not a deal breaker.
Overall, I found this game to be a nice little time killer. It was something I could play in small chunks or large chunks depending on how much time I had and I like that. In the words of my friend Matthew, I give this 3.5 out of 5 slices of meatloaf.
Labels:
#CleverCSI,
review
Monday, October 22, 2012
Pay it Forward!
Hey, wanted to let everyone know you have another chance to participate in a Pay it Forward post! One of my commenters has her post up over at Bead Soup Mix! Go visit now and be one of the first to comment to get your chance to play!
Sunday, October 21, 2012
New Listing in My Etsy Shop????
Bet you forgot I had an etsy shop, much less two!
This weekend I managed to get a couple of photos of one of my polymer clay pendants that I didn't hate, and managed to get it listed. I am hoping to get several more things listed this week. I will keep you posted!
Labels:
etsy,
pendant,
polymer clay,
snowflake
!!!WARNING!!!
Danger, Will Robinson. Danger!
So, you may be wondering why this post started out with dramatic (and/or corny) warnings. Well, there is some new stuff coming to the blog, and I felt it required a little forewarning.
In an attempt to help fund my jewelry making hobby *cough* obsession *cough*, I have decided to try doing some sponsored posts. The first one will be up a little later this week. Now, while I am selling out, I am gonna try to keep it at least somewhat true to my normal posting subjects, that is, jewelry, geekery, and whatever I feel like that day. I am also not, NOT, going to lie about a product or service. If I try it and it sucks, I will either post that, or forgo that post entirely.
So, there is the warning. I will be selling out and trying to actually make small amounts of money from this whole blogging thing... and maybe even getting some free stuff... but I will try to keep it in the minority of my posts, and I won't lie about stuff. So, yeah.
Tuesday, October 16, 2012
Mismatched Art Bead Earrings Part 2
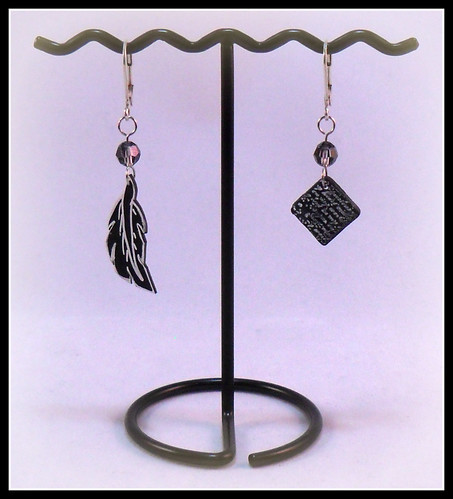
So, I wanted to talk about the earrings I made for this swap. I decided to go with a theme for my beads. We have a black polymer clay tablet (tiny tablet I will give you...) which I stamped with some words... no, I can't read it either... not the point. I used some white acrylic paint to make the words stand out. For the other earring, I made a quill out of black shrink plastic. I used a white Sharpie paint pen to draw the feather quill. I paired these with some black AB crystals I salvaged from a bracelet. Final touch was the silver plated leverback ear wires.
Between the theme and the color matching, I think these are a mismatched pair that pulls together pretty well. I love the idea of using shrink plastic for an art bead. It allows so much room for creativity without having to have any special equipment. It is completely accessible. I like that.
Labels:
earrings,
mismatched,
polymer clay,
shrinky dinks
Mismatched Art Bead Earrings Swap
This month I am participating in the Mismatched Art Bead Earrings Swap. The rules are that you and your partner have to make a pair of mismatched earrings using art beads and swap! I had never made mismatched earrings before, so this sounded like fun.
There are two ways to go about making mismatched earrings. The first way is to pick a theme and have both earrings go with the theme if not with each other. Examples include earrings that say "In" on one ear and "Out" on the other. Or where one earring is a bird and the other earring is a nest. This is the way I went. You can see them over at my partner's blog: Carolyn's Creations. UPDATE: she posted early, so please scroll down a few posts to see the earrings I sent! I will post a picture here tomorrow as well.
The other way is to make earrings that have a similiar feel to them. This is what my partner did. By matching shapes and sizes, as well as color palette, she made two earrings that feel very similar even though they aren't exactly the same. It is kinda like rhyming. "Silver" and "bewilder" don't seem like they would rhyme when you look at them, but if you say them out loud, it's pretty close.
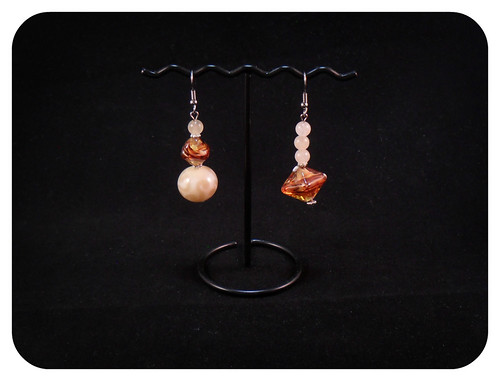
So, here are the lovely earrings made especially for me by Carolyn Lawson!
I have to say I do completely love them!
Please hop around and see the other wonderful mismatched earrings created for this swap!
Diana Ptaszynski http://www. suburbangirlstudio.com
Lisa Liddy http://www.lisaliddy. wordpress.com
Kari Asbury http://www.hippiechickdesign. blogspot.com
Jayne Capps http://mamasgottodoodle. blogspot.com/
Rebecca Anderson http://www.songbeads. blogspot.com
Lesley Watt http://www. thegossipinggoddess.blogspot. com
Lori Bowring Michaud http://www. artfullyornamental.blogspot. com
Renetha Stanziano http://www.lamplightcrafts. blogspot.com
Holly Westfall http://www. silverrosedesigns.blogspot. com/
Theresa Fosdick http://www.thoughtful- notions.blogspot.com/
Ali McCarthy http://www. northwoodscreativestudio. blogspot.com
Shai Williams http://shaihasramblings. blogspot.com/
Iveth Caruso http://www.creativeatelier. net/blog.html
Carolyn Collins http://www. sparklingwaterstudio.com
Elaine Ray http://www.elaineray. blogspot.com
Kristen Stevens http://kristen-beadjourney. blogspot.com/
Charlene Jacka http://clay-space.com/blog
Jan Onipenco http://www.MoltenMayhem. typepad.com
Stephanie Woods http://www.rainydaysdesigns. com
Eleanor Burian-Mohr http://www. cornerstoregoddessjewelry. blogspot.com
Shelby Foxwell http://www. sundownbeaddesigns.blogspot. com
Mary Harding http://www. maryhardingjewelrybeadblog. blogspot.com
Lisa Johnson http://www.Whimsyswonders. blogspot.com
Kashmira Patel http://www.sadafulee. blogspot.com
Penny Neville http://www. copperpennydesigns.blogspot. com
Dee Elgie http://www.cherryobsidia. blogspot.co.uk
Sarah Small http://www.bysalla.blogspot. com
Carolyn Lawson http://www. Carolynscreationswa.blogspot. com
Karin Slaton http://www.backstorybeads. blogspot.com
Ashleigh Becker http://www. seladesignsjewelry.blogspot. com
Kay Hand http://www.creativetangent. blogspot.com
Rana L. Wilson http://ranaleadesigns. blogspot.com/
Sandra McGriff http://www. skyescreativechaos.blogspot. com
Dawn Pierro http://www.turtlemoondesigns. me
Shelley Graham Turner http://www. shelleygrahamturner.blogspot. com
Karen Mitchell http://www.overthemoon- design.com
Melissa Trudinger http://www.beadrecipes. wordpress.com
Labels:
art beads,
earrings,
mismatched,
rhyming
Wednesday, October 10, 2012
Pay it Forward Handmade Give a Way
So, a week or so ago I won the Pay it Forward handmade Give a Way over at Michelle Mach's blog. As part of winning a handmade item from her, I agreed to host a give a way for a handmade item. The winners of my give a way will need to agree to do the same, and so on down the line. An endless chain of handmade presents!
The Rules
For the first three people to comment on the blog (with an email address so I can contact you!) I will create a unique handmade item and mail it to you within 365 days. What that item is... well, you won't know. Maybe it will be one of my rings, or a pair of earrings, or a special card, a resin pendant, a fabric holiday pin... could be anything!
So, please only comment if you want to participate. That is, if you are willing to host your own give a way.
Labels:
give-a-way,
handmade
Sunday, October 7, 2012
Score!
So, last weekend I was able to buy some beads and things from a friend of a friend who was getting out of the jewelry making business. She was a wonderful lady who made me the deal of a lifetime and let me take everything off her hands for a mere $100. I was shocked and thrilled!
Now that I have had a chance to go through everything, I am sharing some pictures of my haul here. First up, jewelry displays!
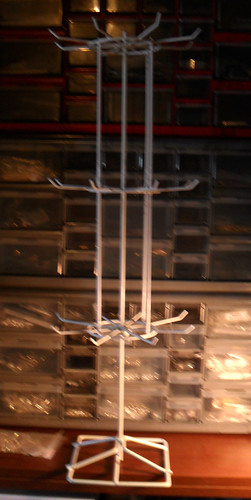
This is one of FIVE twirly displays she included. Great for earrings, bracelets, necklaces.. anything really.
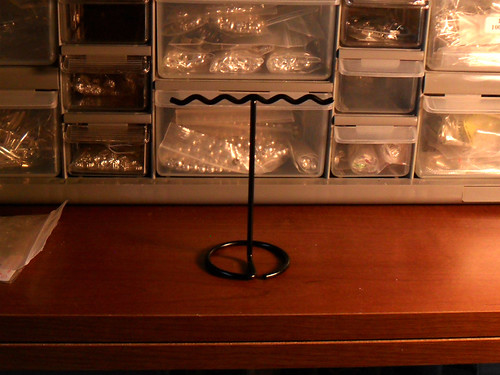
There were FOUR of these small earring displays. Great for taking pictures with!
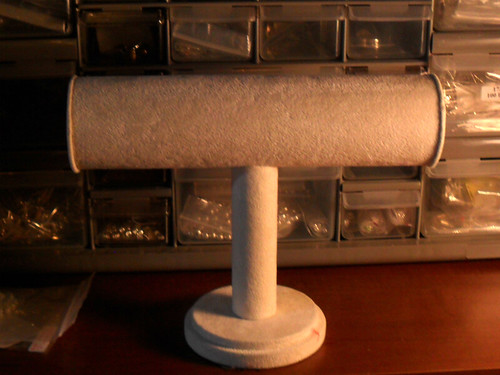
A very nice bracelet display.
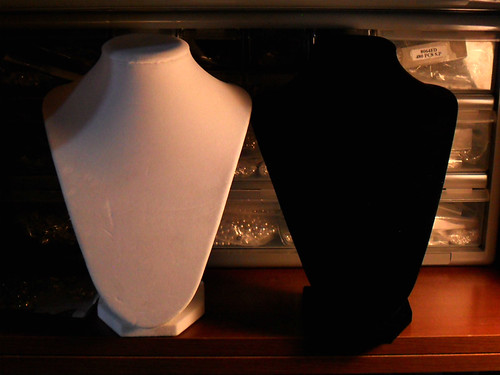
Two small necklace displays.
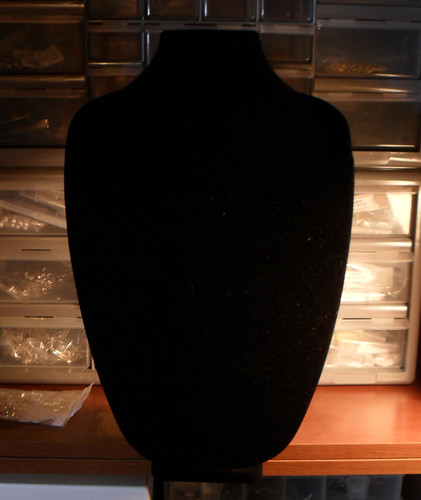
Final display, one large necklace display. I have really been wanting a large one, so this is my favorie of the displays.
Next up are some (by which I mean a lot) of findings, and the storage they came in.
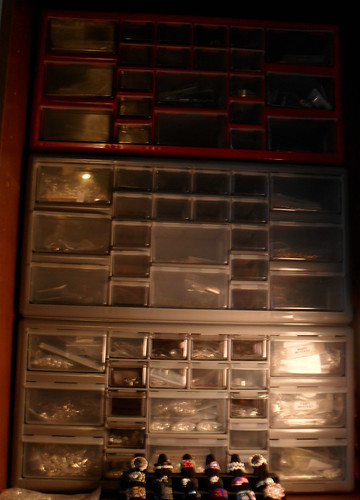
This collections includes silver plated, gold plated, and some mixed metals. More head pins and eye pins then I have ever seen in one place. Earring findings, bead caps, chandelier findings, lobster clasps, toggles... yeah, everything.
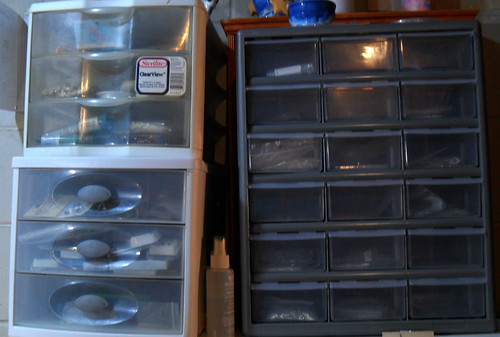
The gray case on the right has more misc. findings. The two white cabinets have seed beads, crystals (lots of crystals!) stringing material, some misc metal pieces, and some tools!
Ok, next we move on to beads!
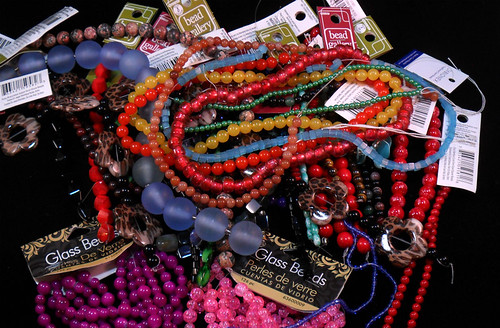
These are the beads on strands... so many pretty pretty strands....
Then we have beads in bags... includes some stones, some cabs, and some metal.
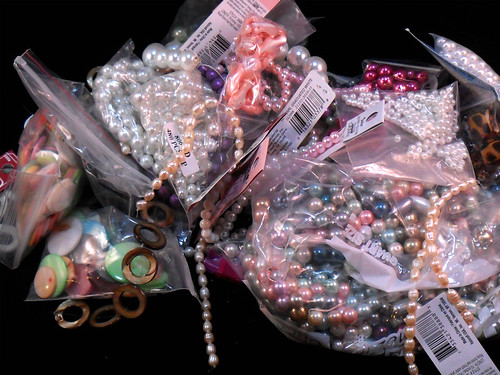
A whole pile of fake pearls and shell beads!
These bags of cloisonne and enameled beads were one of my favorite finds! Do you see the chicken bead? Isn't it adorable?!
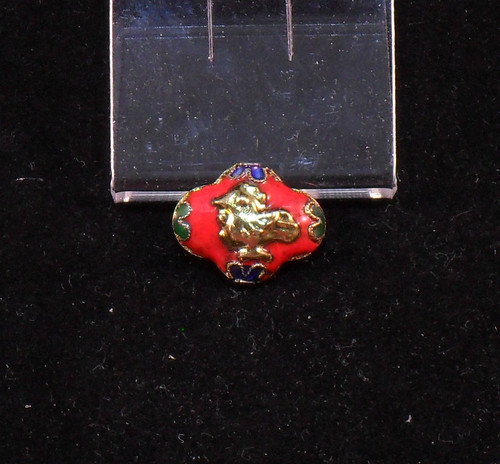
CHICKEN!
Ok, so there was a LOT of stuff! Unpictured are two giant spools of 49 strand beading wire (1000 ft each). I especially love some of the metal beads, the glass pearls, and the plethora of findings!
Wish me luck in using all of this wonderful stuff!
Sunday, September 23, 2012
Kalmbach Bead Soup!
Hey all! In celebration of the release of Lori Anderson's Bead Soup Book, the Kalmbach facebook page sent out a call to designers who wanted to receive a bead soup and make a necklace to show on their page.
Free beads? Yep, I'm there!
So, last weekend I received my soup. A lovely collection of purple beads and crystals with some silver thrown in! My lovely soup was furnished by Advantage Beads in Wichita, KS. Neighbors!
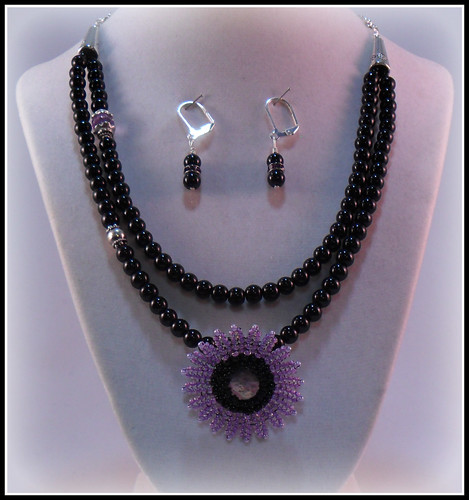
So, I really loved the purples of this soup, but there wasn't a clear focal to work with. So, what to do? Make a focal! I took the coin pearl, used some really, really round peyote to make a bezel for it with black size 11s. From there, I built out and made herringbone flower petals in coordinating purple size 11s. Add a bail to the back(peyote) and it was ready to hang from a double strand of 6mm black glass pearls. To dress up the black pearls, I used one of the large light purple crystals with some silver bead caps and a silver bead. These are set to one side to make an unexpected asymmetrical design. Add some cones to hide the crimps and attach some silver plated chain. I then used the silver toggle that was in the soup as the closure (not pictured).
Though the letter that came with my soup only asked me to make a necklace, I really wanted to make another piece as well... and to use a little more of the actual soup. So, I found that my soup had two purple crystal rondelles, and the rule is "if you have two make earrings!". So I did.
Monday, September 10, 2012
Monday Monday MONDAY!!!!
Happy Monday.
I have been completely entralled with wild sunflowers lately. They are blooming everywhere here in North East Kansas. I get to admire them on the long drive to and from work.
So, remember when I won the stencils? Here is my first project with them.
Sorry, but I was so excited to get to it, that I did not take any before or in progress pictures. I started with a $0.99 wooden frame I picked up at Walmart. I prepared the frame by sanding the edges (they were kinda rough). Once that was done, I did a base coat with some black craft paint.
My original idea was to stencil in silver on the black, but it was suggested to me that the silver/black combo was really quite played out. So, instead we have old nickel on black. Tones the whole thing down a bit. This was the small scroll all over stencil. I used a spray of stencil adhesive to hold it down to the frame.
The instructions that come with these stencils have you use the brush in a circular motion rather than pouncing. This works nicely if you are trying to shade. However, I did find that it shoved the paint against the edges if you didn't off load the brush enough, and some spots ended up with a slight ridge at the edge. Once I figured out to off load until the brush was nearly dry, this went away.
In all, I am rather happy with how this project turned out. I am planning to add one of my parent's wedding photos. Since this frame doesn't have any glass I am gonna print one on photo paper and then coat it with resin. This should help keep it rigid in the frame and protect it somewhat.
Let me know what you think in the comments!
Sunday, August 26, 2012
Decisions, Decisions....
This week I am going to give you a little bit of a glimpse into my design decision making process.
In this first picture, we see a bracelet I am working on. I have finished the beaded section with alternating sections of solid black and silver highlighted. I choose this pattern because I liked the aesthetic, the color blocking... and because I didn't have enough of the silver beads to go the whole length of the bracelet. Anyway... I posted this picture to the Bead Soup Cafe on Facebook asking for some opinions on which cone I should use to finish it off. I felt the shorter length cone worked better, but wasn't happy with the fit of the cone or the pattern on it. I liked the fit and the simplicity of the longer cone, but it was just so darn long!
While I was waiting for some replies, I went back to my stash and actually managed to find a different cone that worked perfectly. It was a shorter length, it fit the beadwork, and it had a pattern that went well with the beadwork! So happy that I didn't settle on either of the first two. SHOP YOUR STASH!!!
Oh, and the other bracelet in that picture is the first one I did in this stitch. Done in cream and an antique bronze, it is a wonderful combination but I really wanted to play with the pattern. If you would like to know how to do this stitch, I learned it from this video on Youtube.
Labels:
chenille stitch,
choices,
design,
video,
youtube
Friday, August 24, 2012
Bead Soup Blog Party: 3rd Reveal!
Today is the day for the 3rd reveal of the 6th Bead Soup Blog Party. I am one of the participants, and today is my reveal! Unfortunately, postal service between the US and Poland is not all one might hope. I haven't received my beads yet and neither has my partner Barbara Błaszczyk.
So, what to do what to do? Well, we are going to go visit all the other blogs participating in the hop! We will start at Lori Anderson's Pretty Things Blog, and from there we can visit all the other participants in this reveal. Should take all weekend, as this is the largest reveal. But what a way to spend a weekend! Have fun!
Oh, and when my beads do finally arrive (I have hope!) I will still be making something and posting it here.
Wednesday, August 22, 2012
Free stuff from Royal Design Studio!
So, you may have seen me announce on Facebook a couple weeks ago that I won a $250 shopping spree from Royal Design Studio. Well, after a couple of missed emails, my free stuff finally arrived!!!
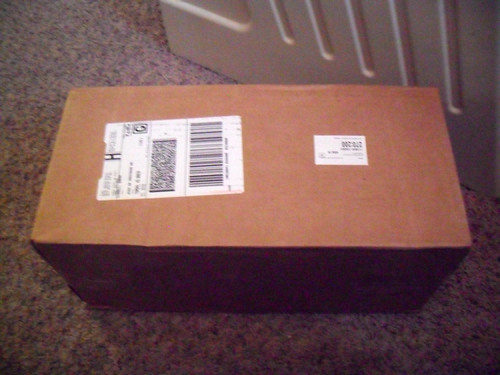
Don't you just love getting packages in the mail? I love it so much that I usually forget to take pictures until after it is all open and put away. This time I documented it all!!!MWAHAHAHAHAHA!!!!
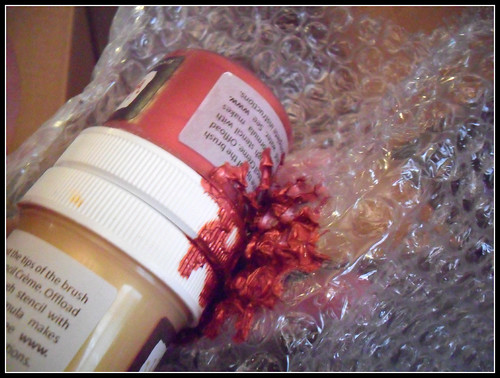
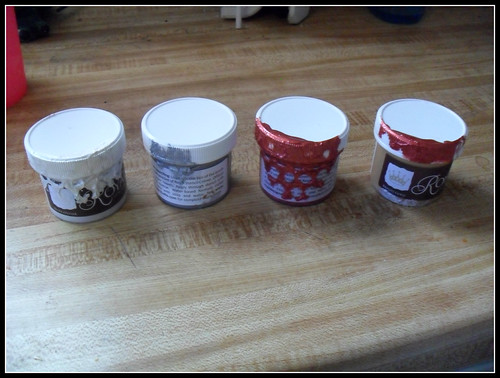
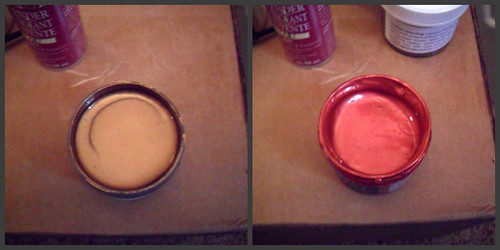
The first unwrapping was slightly sad. Some of the stencil cremes (fancy word for paint) had leaked. I ended up with three of my ten paints that had leaked, and four that had paint on them.
However, when I checked inside the jar that had leaked the most (Renaissance Red) and compared it to one that hadn't leaked (Copper Kettle) there was very little difference. So not much loss.
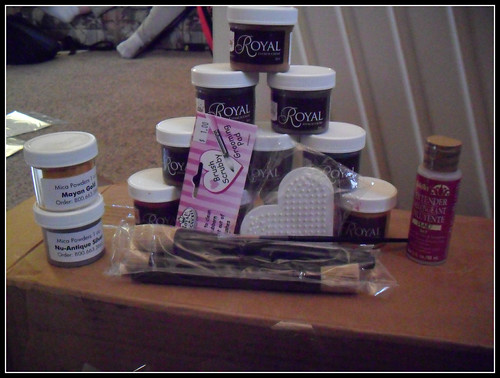
To go with my new paints, I had to get a brush kit. It has a bunch of stencil brushes, some paint extender, and a brush cleaner (heart shaped). (Also pictured are two things of mica powder - Antiqued Silver and Mayan Gold).
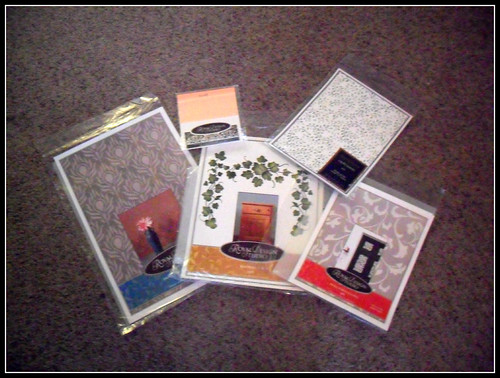
Next we see the stencils I picked out. There are four - an ivy, a scrolly one, a leafy one, and a peacock feather one. They have names, I don't remember them. *shrug* Also pictured is some silver-esque leaf(aluminum). Not pictured, anywhere, is the big bottle of leaf sizing.
So, that is the fun stuff I got. I cannot wait to try my first project - I have already purchased a cheap wood frame I want to redo and some canvases to experiment on. If the small projects go well, I will tackle my bookcase!
Final picture - always save your salad containers. They make great craft storage, and if they are #6 plastic you can make shrinky dinks out of them!
Labels:
free stuff,
I won,
paints,
Royal Design Studio,
shrinky dinks,
stencils
Tuesday, August 21, 2012
New Pattern: The Dark God
Chuthulu here is slightly more suited to a bracelet than a ring. He is just contrary that way.
Tomorrow or Thursday will bring some updates on what I have been making. I have to get some pictures taken. Seeya then!
Subscribe to:
Posts (Atom)